Showing posts with label dessert. Show all posts

Swedish Blueberry and Raspberry Pie with Homemade Custard | Illustrated


To me this pie is the epitome of Swedish baking. Okay, there is no cinnamon or cardamom, but the forest berries and the layered topping just screams Scandi baking. This pie was a classic growing up, and my mum always made it to perfection, like only mums can. Ice cream and pie are always a winning combination, but for the truly Swedish experience, I suggest the custard listed below. Make this pie for friends, family or yourself. Just bring a cup of tea a spoon. 

Ingredients 

Pie crust

150g of softened butter
200g flour
2 tsp baking powder
4 tbsp sugar
50ml cream

Filling 

approx. 300g of frozen blueberries
approx. 200g of frozen raspberries
200ml sugar
2 tsp potato flour (or cornflour but add another tsp)

Custard (not pictured)

2 egg yolks
200ml cream
1 tbsp sugar
1 tsp potato flour (or cornflour, same amount)
2-3 tsp vanilla sugar (or essence)

Baking Time!

  1. Preheat the oven to 225C. 
  2. For the pie crust, mix the butter, flour, baking powder and sugar. 
  3. Remove about a fist full of the pastry and set aside. 
  4. With the remaining pastry, add the cream and combine it. 
  5. At the pastry to a medium sized pie dish and press it out with your fingers. You want the crust to be about 2mm. 
  6. Blind bake the crust for about 10 minutes. Use either baking beans or poke holes throughout the crust to prevent rising. It should be very lightly golden when done. 
  7. For the filling, combine all the ingredients. Add the potato flour last. 
  8. Add the filling into the crust. Crumble on the remaining pie crust that you set aside earlier. 
  9. Bake in the oven for another 20-25 minutes or until the filling feels set. 

Custard 

  1. Combine all the ingredients except for the vanilla. 
  2. Bring to a simmer on a low heat or until you feel it is beginning to thicken. 
  3. Remove from the heat and let it cool. 
  4. Once cool, add the vanilla to taste. 


Mocha Truffles | Vegan


These deliciously little truffles are really a spin of my original chocolate energy balls. You could still call these energy balls, but the addition of the coffee and the toppings, make these feel and taste so much more decadent. That's not to say you can't enjoy the original chocolate ones as dessert too. As with those, these are a great pick me up snack. My personal favourite is to have 2-3 of these with my afternoon coffee (sometimes I have four, but shhh). Since these already have espresso in them, they obviously pair very well.  I know that giving food as gifts is frowned upon by some, but I think putting a few of these in a cute, little plastic bag with a ribbon tied around it, would be a great Christmas gift for a friend or co-worker. Of course you can also keep these luscious treats for yourself too, but it is the season of giving! Hope you give these a try.

Ingredients Makes roughly 20 golfball sized energy balls 

half a shot of espresso
1 heaped tbsp of unsweetened cocoa powder
1.5 dl (150ml) of oats
250g of dates
1 tsp of vanilla extract
3 tbsp of almond butter
a pinch of salt

cocoa powder and/or coconut to roll the truffles in

Steps
  1. Begin by pitting your dates. Then soak them in hot water for in 10 minutes to soften. If you have incredibly soft dates you could skip this stage; however, I find regardless of the quality, soaking them in warm water helps when blending. 
  2. Drain the dates and then add to a food processor or blender. Something like a Nutribullet works fine too! 
  3. Blend the dates until smooth. Depending on your desired texture you can either add all the remaining ingredients into the blender as well. Blitz until smooth. OR you can simply add the rest of the ingredients in whole to the date paste and combine well with your hands in a separate bowl. If the mixture feels too wet, adjust by adding a little bit more oats. 
  4. Finally, roll the mixture into golfball seized balls. Then roll half the truffles in cocoa powder and half in the shredded coconut. I would recommend shaking off the excess cocoa powder over the sink by putting the cocoa-rolled truffles in a fine sieve and shaking gently. 
  5. Refrigerate or alternatively just leave in an air-tight container. Either way is fine, but obviously refrigerating will give for a firmer texture. 
  6. Enjoy!  


Seriously Delicious Raw Chocolate Energy Balls


These energy bites are a great pick-me-up for the afternoon slump, but their natural sweetness also make them a perfect, guilt-free dessert. I created this recipe as a snack to bring with me to university thinking they would be reminiscent of Nakd bars or a similar raw energy ball. To my surprise, I like my own homemade version so much better. I am having a hard time not eating them all in one go. Whilst these energy balls are healthy, they do of course have good, natural fats and so moderation is always important. Pair these with a coffee, tea or large glass of milk for a perfect afternoon "fika" or simply grab on the go for a boost of energy. I like mine plain, but these would be delicious rolled in cocoa powder, desiccated coconut or even chopped nuts. If you are feeling really ambitious, make a few of each topping. Either way, you will find these so incredibly more-ish. Good thing they are incredibly quick to make.

Ingredients Makes roughly 20 golfball sized energy balls 

1 heaped tbsp of unsweetened cocoa powder
1 dl (100ml) of oats
250g of dates
1 tsp of vanilla extract
3 tbsp of almond butter
a pinch of salt

Preparation
  1. Begin by pitting your dates. Then soak them in hot water for in 10 minutes to soften. If you have incredibly soft dates you could skip this stage; however, I find regardless of the quality, soaking them in warm water helps when blending. 
  2. Drain the dates and then add to a food processor or blender. Something like a Nutribullet works fine too! 
  3. Blend the dates until smooth. Depending on your desired texture you can either add all the remaining ingredients into the blender as well. Blitz until smooth. OR you can simply add the rest of the ingredients in whole to the date paste and combine well with your hands in a separate bowl. 
  4. Finally, roll the mixture into golfball seized balls. If you want a topping, simply roll them in your desired topping before refrigerating. 
  5. Refrigerate or alternatively just leave in an air-tight container. Either way is fine, but obviously refrigerating will give for a firmer texture. 
  6. Enjoy!  


Chocolate, Peanut Butter 'Nice' Cream | Dairy Free


I am not going to claim this 'nice' cream is better than full-fat, rich vanilla ice-cream. It is however delicious, chocolate-y, rich and sweet. It is great for after the gym, as a dessert or even breakfast. Plus it dulls the chocolate craving. Yes, you can now have a guilt-free ice-cream for breakfast. It is incredible how the frozen banana makes such a perfect soft-serve consistency. This 'nice' cream is also dairy free meaning you can serve it to all your vegan and lactose intolerant friends! This treat is so customisable, but this flavour combination is my favourite. Feel free to top with fresh fruit, toasted nuts, chocolate sauce (dairy free or not). Make it your own! You will, however, need a blender or preferably a food processor. 

Makes one large serving
Ingredients
2 frozen bananas, cut into 2 cm pieces 
1 tbsp of raisins or 2 dried dates 
1 tbsp of peanut butter, I prefer chunky rather than smooth 
1 tbsp of unsweetened cocoa powder 

Preparation
  1. For best results freeze your bananas overnight. At the very least for 4 hours. If you do not wait long enough you will have more of a chocolate mousse than a soft-serve consistency. Either way is delicious, but not properly frozen is better. 
  2. Pulse the raisins in a blender or food processor until smooth. 
  3. Add the bananas and pulse or blend until almost completely smooth. You want a few lumps remaining. If you are bananas are not blending evenly, scrape down the sides and make sure everything is getting equal opportunity to hit the blade. 
  4. Add the cocoa powder and peanut butter. Blend until fully smooth. Make sure to stop as soon as the mixture is lump-less otherwise it will get too loose. Alternatively you can add the peanut butter at the end for a streak of peanut butter running through. 
  5. Enjoy! 
  6. For extra texture, sprinkle on some dried fruit and nuts.


Mini Orange Cakes with a Vanilla Buttercream Swirl


Since moving to England 3 years ago I have definitely moved onto the tea drinking bandwagon. Part of that tea drinking bandwagon is cake. Sounds awful I know. No, not every tea needs to be accompanied with cake. With that in mind, tea and cake go together like cookies and milk. These mini orange cakes are perfect for afternoon tea. Their smaller size makes them feel a bit less naughty. I would suggest pairing these beauties with Early Grey or Lady Grey as these teas have lovely citrus notes. A breakfast tea is perfectly acceptable. Or the only acceptable tea for cake if you ask my boyfriend. I guess he is English, but I'm stick with my Early Grey. 

Ingredients 

Cake 

175g softened butter
140g caster sugar
2 medium eggs 
140g flour 
50g of ground almonds
1 tsp baking powder
1 tsp vanilla extract 
zest of 2 oranges, 1/2 an orange for the cake, 1 1/2 for dipping 
juice of 2 oranges 
100g granulated sugar 

Buttercream 

110g of butter
190g of icing sugar
1 tsp vanilla extract
1-1 1/2 tbsp of cream 
  1. Cream the butter to add lots of air. It should turn a light shade of yellow. 
  2. Slowly add the icing sugar until it has fully combined with the icing sugar. 
  3. Add the vanilla and 1 tbsp of cream, whisk together. 
  4. Add more cream depending on the consistency. To pipe on the cake, you need firm peaks.
Baking Time!

  1. Preheat the oven to 180C or 160C fan. 
  2. Line a pan (approximately 20x20cm) with parchment paper. 
  3. Cream together the butter and sugar until fluffy and light.
  4. Add the eggs, vanilla, zest and 1/2 an orange's juice. Most likely the mix will curdle but do not be alarmed! 
  5. Add the baking powder, flour and almonds. 
  6. Whisk together on a high speed for about 5 minutes until the mixture is full of air. The mixture should no longer be curdled now that the dry ingredients have been added. 
  7. Bake in the middle of the oven for 25-35 minutes or until a knife comes out clean. 
  8. Let the cake cool and then remove it from the pan. 
  9. Cut off the edges of the cake and the cut into 16 small squares. 
  10. Apply some orange juice to the top and sides of the cake either by dipping very carefully or using pastry brush. 
  11. Then sprinkle or dip the cakes into the granulated sugar. 
  12. Finally pipe on the buttercream frosting and add some orange peal for garnish. 

Super Quick | Anniversary Banana Pancakes with Roast Plums


My boyfriend and I just celebrated five years together. What better way is there the celebrate anything than pancakes? Not that you need a reason for pancakes. This banana pancakes are easily made guilt free. For us the maple syrup and buttery plums are just enough decadence to make these simple and super quick pancakes sing.


Ingredients Serves 2 

2 eggs
2 bananas, very ripe
4 heaped tbsp of flour (wholemeal or white)
4 small plums
2 x a small knob of butter

Optional Toppings: greek yoghurt, honey or maple syrup, a physalis fruit

Preparation 

  1. Mash the bananas until smooth. 
  2. In a bowl, whisk the bananas with the eggs. 
  3. Add the flour and whisk until the batter is smooth. 
  4. On a medium heat with a small knob of melted butter, add 2 tbsp of batter for each pancake and fry on each side until golden. You can tell the pancake is ready  to flip when small bubbles appear on the surface of the pancake. 
  5. When almost finished making the pancakes, in a separate pan, heat a knob butter in a medium heat. 
  6. Remove the core of the plums, cut in half and add too the pan. 
  7. Fry the plums until golden. 
  8. Serve the pancakes with the plums and your choice of toppings. 
  9. Enjoy! 


Vegan Banana Bread | Also Oil, Sugar and Gluten Free

A vegan friend from university has been visiting us in Switzerland, and I really wanted to make a banana bread recipe that he would like. Since I love banana bread for breakfast, I wanted it to be like my original healthy banana bread recipe but without the eggs and white flour.  This recipe can easily be made decadent by adding sweeteners. I would suggest about 6 tbsp of maple syrup.


Ingredients 

Dry ingredients 
300g of finely ground gluten free oats (use a food processor or blender)
1 tsp baking powder
1/2 tsp salt
1/2 tsp baking soda
1 tsp cinnamon

Wet ingredients
5 very ripe bananas
10 dates
6 tbsp apple sauce (unsweetened)

Preparation
Preheat your oven to 150C or 300F. Prep a loaf tin with a bit of oil. Add your dates, bananas and maple syrup (if using) into a food processor or blender. Pulse until almost smooth. A few lumps of banana will make for a lovely texture once baked. Alternatively, you can mush your bananas with a fork and finely chop your dates.  Pour your wet ingredients into a large bowl. Mix in the apple sauce. In a smaller bowl combine all of your dry ingredients (baking powder, baking soda, salt, cinnamon and oatmeal). Fold in the wet ingredients into the dry ingredients. Gently pour or spoon the banana bread mix into the prepared loaf tin. Bake for 40-50 minutes in the centre of the oven until fully golden and fully baked. A toothpick should come out clean from the middle. If around 30 minutes you feel the banana bread is browning too quickly, simply cover the loaf with some aluminium foil. Enjoy as is or lightly toasted! Peanut or almond butter is a great vegan topping :) 

Healthy and Delicious Banana Bread (No added oil or sugar)


I've always heard that banana bread is just as good without added sugar because over ripe bananas are just so sweet. I have the biggest sweet tooth on the planet or at least second to my dad. So unsurprisingly I have been skeptical of banana bread with no added sugar. However, I have really been craving something more exciting than just plain toast for breakfast, so I thought I would give it a try. This banana bread can be made sweeter with a tbsp of honey and some chocolate chips (I added the chocolate as you can tell). Honestly though, you don't need either one. If you feel like you want the honey then go ahead and add it or drizzle some one the finished, baked product. I tried this recipe out on my family and a few friends. The general consensus was that no one believed it was healthy. This banana bread is still super sweet and packed full of potassium. I'm kind of craving some now. Too bad I don't have any bananas at home. Crap.

FYI: If you have a nut allergy, the almond meal can be substitute with just more regular, plain, old, white flour.


Ingredients


2.5 dl or 2 (US) cups of plain flour
2.5 dl or 2 (US) cups of almond flour/meal
2 tsp baking powder
1 tsp baking soda
1 tsp salt
1 tsp cinnamon
10 pitteded dates
8 very ripe bananas
2 eggs

Optional:
1 tbsp of honey
a handful of dark chocolate chips

Preparation

  1. Preheat your oven to 150C or 300F. 
  2. Prep a loaf tin with baking spray and line with baking/parchment paper. 
  3. Add your dates, bananas and honey (if using) into a food processor or blender. Pulse until almost smooth. A few lumps of banana will make for a lovely texture once baked. Alternatively, you can mush your bananas with a fork and finely chop your dates. 
  4. Pour your wet ingredients into a large bowl. 
  5. In a smaller bowl combine all of your dry ingredients (baking powder, baking soda, salt, cinnamon and flours). 
  6. Add 1/3 of the dry ingredients into the larger bowl with the wet ingredients. Combine with a spatula taking care not to over mix. Then add one egg. Combine. Add another 1/3 of the dry into large bowl. Then the last egg. 
  7. Finally add the final 1/3 of flour and combine with the spatula. 
  8. If you are using chocolate chips toss them in some plain flour, then fold into the mixture as well. Take care not to add too much additional flour.
  9. Gently pour or spoon the banana bread mix into the prepared loaf tin. 
  10. Bake for 60-70 minutes in the centre of the oven until fully golden and fully baked. A toothpick should come out clean from the middle. 
  11. If around 30 minutes you feel the banana bread is browning too quickly, simply cover the loaf with some aluminium foil. 
  12. Enjoy as is or lightly toasted! I like mine with fresh raspberries. Cream cheese is a naughtier but delicious topping too!


Princesstårta (Swedish Princess Cake)


Serves 12-16 / Total time: approx. 3 hours

PrincesstÃ¥rta is probably the most classic Swedish dessert you are ever going to get. I was so surprised and pleased to see it on this years Great British Bake-Off. Despite eating it at a fair few birthdays I had never actually made it myself. The end result is definitely worth the effort, but I would not recommend making this in a hurry. Leave yourself plenty of time by tackling this cake the day before any party or big celebration.  
Ingredients 

Vanilla Custard

4 egg yolks
400 ml cream
2 tbsp caster sugar
2 tsp potato or cornflour
4-6 tsp vanilla sugar or 2-3 tsp vanilla essence

Sponge

4 eggs
225g caster sugar
62g flour 
62g potato or cornflour
1 tsp baking powder

Marzipan (you can just buy some from the store just make sure to colour it!)

400g ground almonds
150g caster sugar
250g icing sugar, sifted
2 eggs, beaten
1 tsp almond extract (optional if you do not like a strong almond flavour)
green paste food colouring 

To decorate and for assembly

a pink fondant rose
150ml double cream
50g dark chocolate, melted
any flavour of jam (traditionally raspberry)

Preparation

The Cake


  1. Preheat your oven to 175C (350F). Butter a 23 cm (9" x 2" or 2L) round baking pan. Line the bottom of the baking pan with a piece of baking paper. 
  2. Place the eggs and sugar in a large mixing bowl. Mix on high until light and fluffy; it should be very pale and thick. When you take the whisk(s) out they should leave a ribbon-like trial on the surface. This should take about 5 minutes. 
  3. Carefully sift in the flours and baking powder. Carefully fold in whilst keeping as much air in as possible. 
  4. Pour the mixture into the prepared tin. Bake for about 40 minutes on the lower portion of the oven. The cake is finished when slightly golden and a toothpick comes out clean. Start checking the cake around the 25-30 minute mark. Let the cake cool slightly in the pan before turning out onto a rack to cool completely. It must cool completely or it will be very difficult to cut! 
The Custard
  1. Place the cream, egg yolks, potato flour and sugar in a small sauce pan. 
  2. Whisk the ingredients together. Cook over a low heat, constantly stirring until the custard thickens. Make sure to keep an eye on it. It can seem like nothing is happening and all of a sudden it will become very thick!
  3. Remove from the heat, stir in the vanilla. 
  4. Apply clingfilm to prevent a skin forming on the top of the custard. Allow to cool completely and then chill in the fridge. 
The Marzipan
  1. Mix the ground almonds and sugars in a large free-standing mixer using the dough hook. 
  2. Add the eggs and almond extract (if using). Once it has combined well, dust your work surface well with icing sugar and then place on the surface. 
  3. Knead the marzipan to soften it up. Then add the green food colouring sparingly until your reach the right green colour. 
  4. To easily roll out the marzipan, place it between two large pieces of parchment paper. Roll into a thin, even circle about 40cm in diametre. 

Assembly 
  1. Using a serrated knife, slice the cake into three layers. Keep the top layer slightly thinner than the bottom two layers. 
  2. Spread a thin layer of jam on the bottom slice. Add a generous layer of vanilla custard on top. Use a knife or piping bag. You should be generous with the custard, enough to cover the layer at least.
  3. Add the next sponge cake. If you really like jam you can add a thin layer here too like I did. Traditionally no jam at this stage though. Add another generous layer of custard. 
  4. Whip up the cream until stiff peaks. Fold the cream into the remaining custard. 
  5. Add the creamy custard onto the final piece of sponge. Gently form the custard cream into a dome shape. Make sure to keep a small amount of spread around the sponge layers as well. 
  6. Gently lay the marzipan over the cake. Carefully define the shape of the dome using your hands. 
  7. Trim the excess marzipan. Pipe some extra whipped cream around the edge of cake if you want a neater finish. 
  8. Dust the top with icing sugar, pipe on some melted chocolate and add the fondant rose. 
  9. Refrigerate before serving. About an hour minimum is what I would recommend; overnight is probably best.

Reference recipes:

http://semiswede.com/2011/09/21/princess-cake-demystified-prinsesstarta/
Great British Bake Off: Big Book of Baking - Mary's PrincesstÃ¥rta 


Filo, Blueberry and Ricotta Parcels


Serves 2-3 / Cooking time 10 min

This recipe was a bit of an experiment. I had a lot of left over filo from my salmon brik recipe and I thought these beauties would be an excellent way to use it up. They are very moreish and a quick and easy desert.  
Ingredients

5 sheets of filo pastry
4 tbsp of blueberry jam (can use any you like!) 
1.5 tbsp of ricotta cheese
1 tsp of lemon zest 

Serve with: honey, greek yogurt and some sea salt  

Preparation 
  1. Combine your blueberry jam, ricotta and lemon zest. 
  2. Cut each filo sheet in half. 
  3. Place a heaped tsp of filling into the corner of your filo. 
  4. Fold into a triangle. Repeat the triangle folds until you run out of pastry. Like this! 
  5. Make sure to seal the pastry well with your fingers.
  6. Heat one 1 tbsp of olive oil in a non-stick pan on medium heat. Add the parcels and cook on both sides until golden and crisp. You may need to do this twice depending on the size of your pan. 
  7. Serve with honey, yoghurt and a sprinkle of sea salt. 
  8. Enjoy! 


Very Vanilla Cupcakes Filled with Pastry Creme


This cupcakes are one thing: vanilla! A light and fluffy vanilla cupcakes filled with a vanilla pastry creme and topped with vanilla frosting.

      Prep Time             Cook Time              Makes      
20 min 15-25 min 12


Ingredients 

Cupcakes 

175g of unsalted butter, softened
3 eggs 
175g of sugar 
175g of flour
2 tsp of baking powder 
2 tsp vanilla extract 

Pastry Creme (You will not use all of it! Having would be okay) 

300ml of milk 
1 tsp vanilla extract 
3 large egg yolks 
60g of sugar 
2 tbsp flour 
2 tbsp cornstarch 

Frosting 

1 tsp vanilla extract 
225g of butter
125g of icing sugar 
1-2 tbsp of milk or creme 

Preparation
  1. In a medium-sized bowl, mix together the egg yolks and sugar. 
  2. Sift in the flour and cornflour and combine into the egg and sugar. It should form a paste. Set aside. 
  3. In a saucepan, bring the milk to a boil. It is perfect when the milk starts to foam. 
  4. Remove the milk from the heat whisk in the paste. Whisk constantly to prevent curdling. You might want an extra hand here!
  5. Pour the mixture back into the sauce pan and cook over medium heat until boiling. Make sure to whisk constantly. 
  6. Once it reaches boiling, whisk constantly for another 30-60 seconds or until thick. 
  7. Remove from head and add the vanilla extract. 
  8. Set aside to cool to room temperature. 
  9. Preheat the oven to 170C and line a cupcake tin. 
  10. Cream together the butter and sugar. They should be well incorporated into a pale yellow mixture. 
  11. Whisk or beat in one egg at a time. Then add the vanilla. 
  12. Finally, sieve in the flour and baking powder. Combine in or whisk for 5 minutes. 
  13. Bake in the oven for approximately 14 minutes. Use a fork to check for readiness. The top of the cakes should not be brown but have a spongy texture when touched. 
  14. Set aside to cool. 
  15. For the frosting, mix together the icing sugar and the butter. 
  16. Mix on low until well blended and then on medium/high for 3 minutes. 
  17. Add the vanilla and milk/creme and continue to beat for another 1 minute. Add the liquid slowly until you reach desired texture. 
  18. The right amount should produce a frosting that can hold a peak. 
  19. Once the cupcakes have cooled, fill them with the pastry cream and then frost. 


Bananas Foster Cupcakes


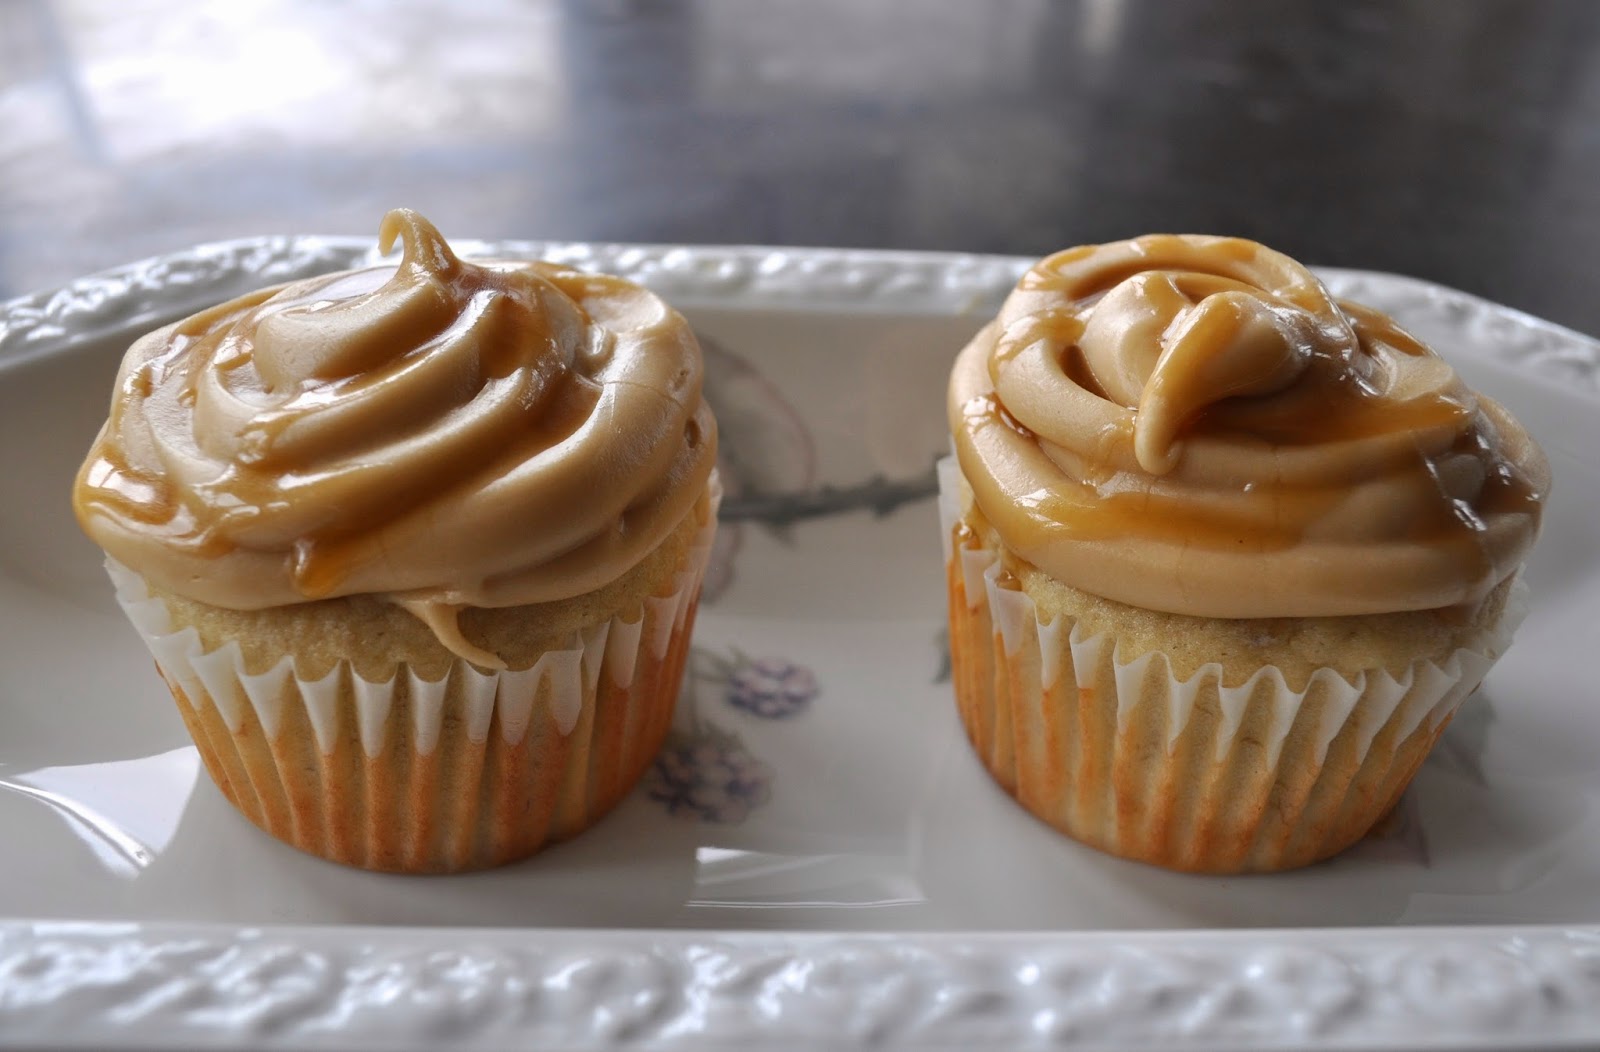
I made these cupcakes for my sister's coming home party and they were a big hit. I knew I wanted a caramel frosting as that is my sister's favourite topping, but I could not think of what to pair it with. Then I thought of bananas foster and came up this combination. I think it's a real winner! Hope you give it a try.

      Prep Time             Cook Time              Serves      
20 min 18-25 min 12


Ingredients 

Banana Cupcakes 

100g of unsalted butter, softened
2 large eggs 
175g of sugar 
225g of flour
2 tsp of baking powder 
3 tbsp of greek yoghurt
3 medium-sized, very ripe bananas 

Caramel Frosting 

200g of softened, light brown sugar
60ml of milk 
225g of butter
250g of icing sugar 

Preparation
  1. Preheat the oven to 180C and line a cupcake tin. 
  2. Cream together the butter and sugar. They should be well incorporated into a pale yellow mixture. 
  3. Whisk or beat in one egg at a time. 
  4. Mash the bananas, whisk or beat them in as well. 
  5. Spoon in the greek yoghurt, combine well. 
  6. Finally, sieve in the flour and baking powder. Combine in or whisk. 
  7. Bake in the oven for 18-25 minutes. Use a fork to check for readiness. The top of the cakes should not be brown but have a spongy texture when touched. 
  8. Set aside to cool. 
  9. For the frosting, melt the butter on a medium/low heat. Add the brown sugar.
  10. Bring to a boil and then let simmer for 2 minutes, stir constantly. 
  11. Then, let the caramel cool to lukewarm before adding the icing sugar. Set aside about 2 tbsp of the caramel for drizzling. 
  12. Mix the icing sugar in increments. The right amount should produce a frosting that can hold a peak. 
  13. Once the cupcakes have cooled, frost them with the frosting. 
  14. Drizzle the remaining caramel on top.